Dual electric fan conversion

After making the brackets for the lower edge, I turned my attention to the top edge. Because I wanted to be able to remove the fan assembly easily, I looked at ways to secure the fans to the top edge with removable clips. These engage where the original fan shroud clips engaged. Once again, I used an aluminum strip to brace the upper edge to stop sagging.
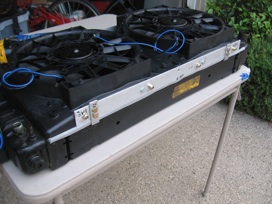
Visible at left are the two clips, each held on by two gold-colored 1/4-20 bolts with thread into tapped holes in the aluminum crossbar. Also visible is the draft-excluder tape used to seal around the edge of the dual fan casing.
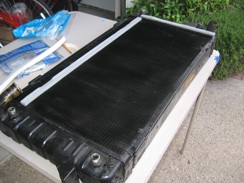
Visible at left is the radiator with a sealing strip across the lower portion and the far side. This seals the lower edge of the electric fan casing and one side (the other side was a pretty flush fit). A seal was applied to the upper edge right across the top lip of the cap.
The photo at left shows the dual fan assembly installed, and shows the clearance. The water pump pulley is dead center in the picture, with the fan removed of course. There is about 3” clearance between pulleys and the back of the fan casing.
